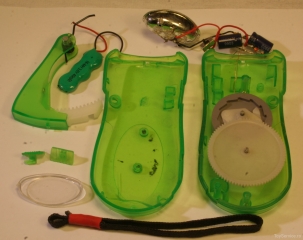
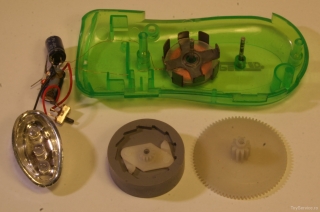
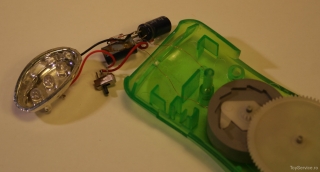
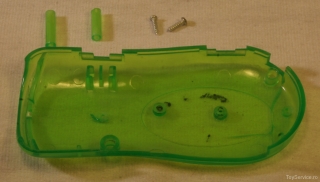
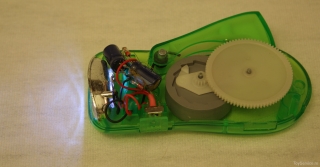
Long before the idea of this website ever occurred to us, as a result of our mutual interest for ecological illumination (along with many other interests), we changed a LED flashlight with dynamo, a very cheap model, but whose performances we improved. Now, because of an accident, this flashlight had to be fixed – and it also got to be the subject of this article.
The history of the defect/ accident
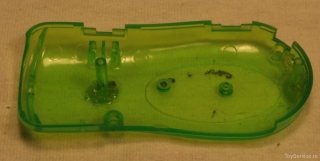
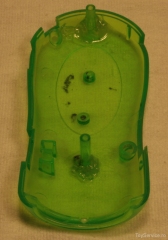
The LED flashlight fell apart as a result of its smashing against concrete(*) – falling from about 1.2 m high – and all its guts spread all over the place, but, lucky us, they were all recovered. Hence, with a little bit of luck, we had a chance to make it work again, as we had started liking to use it – as much of a cheap Chinese piece of crap as it was.
Action plan
After a first brief examination of the recovered pieces and being familiar with the type of plastic of its case (hard and breakable: celluloid?) we only had one option: gluing it with solvent, followed by the trussing of its frame. Later on, we were going to find a way to make it more durable.
On the other hand, I need to mention the initial story too, that of me buying the flashlight. It is indeed a cheap model but not misleading(**), so it did contain an 8 pole single phase generator, below 1000 rpm, that could charge an 3 cell Ni-Mh rechargeable battery at 3.6V and 40mAh. As it had a small battery, we were not at all satisfied with a single-wave rectification, and from here to the idea of completely changing the rectifier there was just a small step.
Necessary tools and parts
For the first operation – the tuning – we needed electronic parts (diodes, electrolytic capacitors), Weller, wires, a gauge and some more room inside for some extra wires.
For the actual repairing, we used solvent (dichloroethane), a grip vice and some plastic for fillings (also celluloid).
The repairing process
W can’t get over the modifying (the tuning) of the original LED flashlight without having this conversation about rectifiers. I will try to keep it short, but it is a “good” topic(***), and for a complete understanding of the phenomena, please go to wikipedia or, better than that, professional courses.
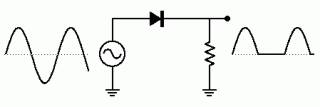
Single-wave rectifier:
This is the initial rectifier, which uses only half of the energy available in the generator (dynamo), not to mention asymmetries, bias and other “benefits”.
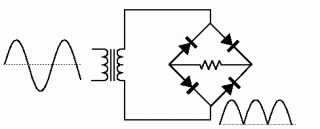
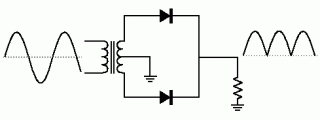
Double-wave rectifier:
This seems to be the ideal choice as it uses both waves and 100% of the available energy (minus the collateral losses – wires, diodes…) Unfortunately for us, the bridge rectifier, under practical circumstances, causes a loss of 2×0.7V = 1.4V, which is bit too much.
For the center-tapped design, we didn’t plan for such a major intervention (riveted coil, unwinding, rewinding with center-tap, …) We probably had room for the necessary extra amount of copper and YES, we will give it a try sometime later…
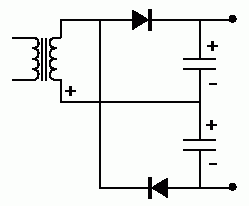
Voltage Doubler rectifier:
We chose this option (it uses both waves, with one diode on branch and doubles the tension) for several reasons:
- Lower voltage drop, outweighed by doubling;
- Better charging at lower revolutions;
- A relatively simple and fast intervention.
Our thanks to HyperPhysics website of Georgia State University for the images used above.
The actual repairing went smoothly: gluing stems, filling with plastic shavings, assembling and – because we could no longer trust screws – loads and loads of adhesive tape.
The final result
As this was an already tested change – that we were already familiar with – the results were the ones expected: lower revs charging (You don’t need to “hand-pump” like crazy), greater mechanical load (increased field) and lower spin-wheel inertia (unobtrusive), faster charging with a lower pace.
This repairing gave us a completely functional flashlight and a bonus: the adhesive tape behaves better at the impact, making it less destructive; maybe a thicker layer would do even better…
Other comments
This topic is far from being covered, there is more to experiment and build, at least recomputing and rewinding the generator, better batteries (Li-Poli or Li-Ion), LED driver circuit, ş a. It’s quite a large area and we’re so much into it…
Available images:
This article is on devtome.
———————-
(*) As you probably already know, it’s not the fall that kills you, but the sudden stop that follows it!
(**) In the articles to come we will get into more details regarding the fake flashlights, with a dynamo but also with a non-rechargeable battery.
(***) We remind our advanced readers that we need to keep our explanations to a certain level. For a proper explanation, we recommend (our) bibliography: Moseanu, Rudenko, Rice, Wells and so on.

